
How Leonardo AI Creates Stunning Images in Minutes
By Shahzaib Shah: June 2, 2026·10 min read
I’ll be honest — the first time I tried making AI-generated images, I spent about two hours getting results that looked like a fever dream. Weird hands, melting buildings, dogs with six legs. It was genuinely funny but also a little demoralizing.
Then a friend mentioned Leonardo AI. She’d been using it as her primary AI image creation tool for a small indie game she was building—just her and a laptop in her apartment—and the images she showed me stopped me mid-scroll. Clean, detailed, stylistically consistent concept art that looked like it came out of a proper studio. I asked if she’d hired an artist. She hadn’t.
That was about eight months ago. Since then, I’ve used this AI creative platform for everything from blog thumbnails and social media graphics to storyboarding a short film concept. And I’ve learned a lot — including some embarrassing mistakes I’ll save you from making.
“You don’t need to be a designer or an illustrator to create images that look genuinely professional. You just need to know how to talk to the tool—and understand the workflow.”
What Actually Makes Leonardo AI Different
There are a dozen AI image generators out there right now—Midjourney, DALL·E, and Adobe Firefly. They each have their strengths. But Leonardo AI has carved out a very specific niche that makes it a go-to AI concept art tool and visual content engine for digital artists, illustrators, brand designers, and content creators who care about creative control and style consistency.
The platform is built on top of Stable Diffusion models but layers its own fine-tuned Leonardo AI models on top. What that means practically: you get access to models trained for specific styles — photorealism, anime, concept art, architectural visualization, and fantasy illustration — and you can switch between them depending on what you’re building. It’s a proper browser-based creative studio, not just a prompt box.
There’s also the AI Canvas, Leonardo AI video generation, 3D texture generation, an image upscaler, and a feature called Image Guidance that lets you use one image to influence the style or composition of your output. These aren’t gimmicks. Once you use them a couple of times, going back to plain text-to-image feels limiting.
A Quick Look at Core Leonardo AI Features
AI Image Generation
Text-to-image with fine-tuned models for photorealism, illustration, concept art, and more.
Video Generation
Animate still images into short video clips—great for YouTubers, streamers, and UGC creators.
3D Texture Generation
Generate game-ready textures directly from prompts — a huge win for indie game developers.
Image Upscaler
Enhance and upscale outputs to high-resolution images without losing detail or sharpness.
Prompt Generation
Not sure how to write a prompt? Leonardo’s built-in prompt generator gives you a solid starting point.
Personal Model Training
Train your own custom model on a set of reference images for a locked-in, consistent visual style.
Getting Started: What to Expect on Day One
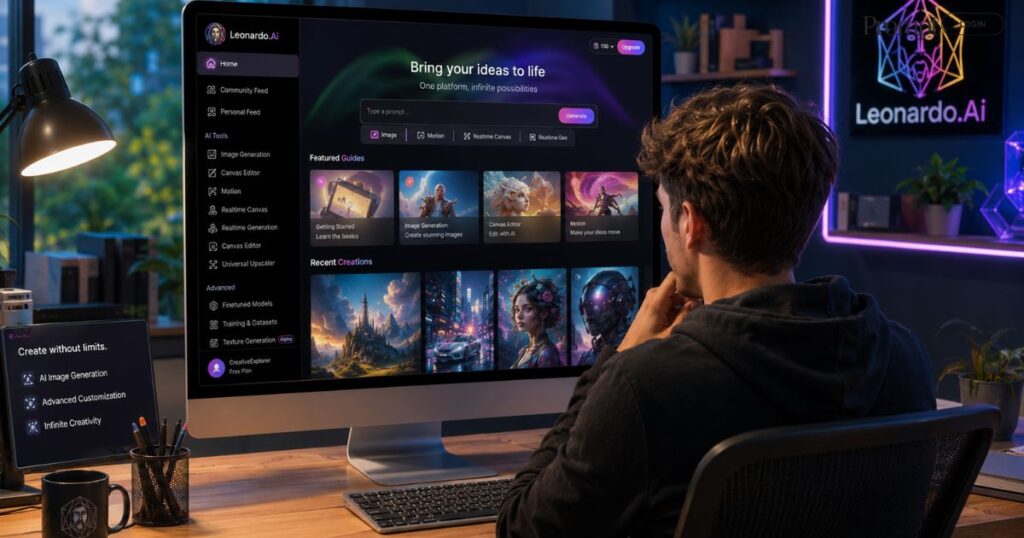
The Leonardo AI web interface runs entirely in a browser — no downloads, no GPU required. You sign up, land on a clean dashboard, and immediately have access to the full generation suite. There’s also a Leonardo AI mobile app if you prefer working from your phone, though I find the web version more comfortable for serious work.
The platform uses a Leonardo AI token system — you spend tokens each time you generate images. On the free tier, tokens regenerate daily, which is surprisingly generous for beginners.
Step-by-step: your first image in Leonardo AI
- Head to app.leonardo.ai and create a free account. The Leonardo AI free tier gives you 150 tokens daily — more than enough to experiment with the full Leonardo AI workflow.
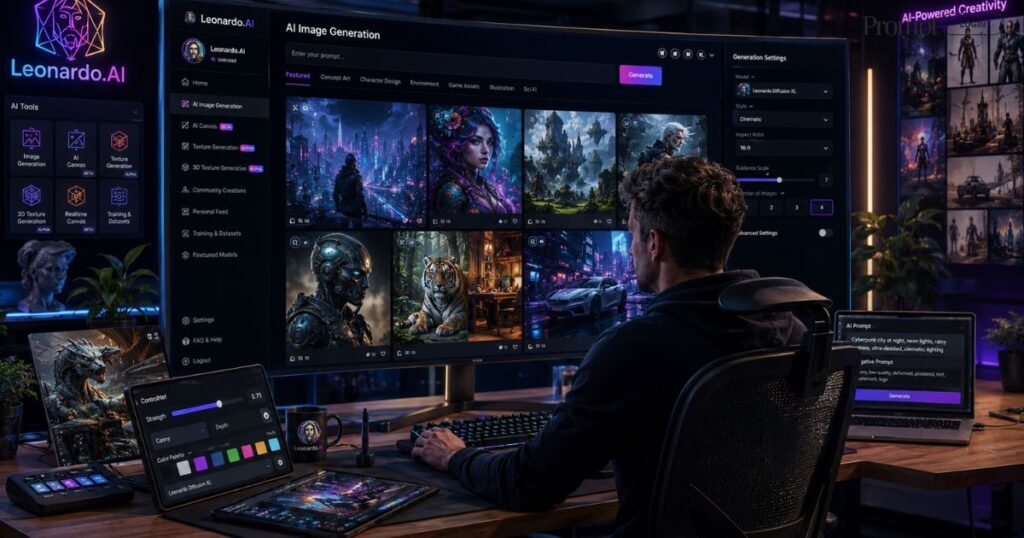
- Click “Image Generation” from the left sidebar. You’ll see the main panel with a prompt box and model selector. This is the heart of the Leonardo AI image generator.
- Pick a model before you do anything else. The Leonardo AI models library is searchable — if you’re going for photorealistic portraits, cinematic realism, or stylized illustration, pick the model that matches your goal.
- Write your prompt with intention. Use prompt engineering principles: include the subject, setting, lighting, mood, and style. “A lone astronaut sitting on a rocky cliff overlooking a glowing alien city, soft purple lighting, cinematic, 8K” will beat “an astronaut on a planet” every time.
- Set your image dimensions. Portrait, landscape, or square — this shapes composition. For marketing visuals and social content, match the aspect ratio to your platform before you generate.
- Hit Generate. You’ll get 4 variations in 20–40 seconds. Evaluate, adjust your prompt, and iterate. That’s the core of a smart AI creative workflow.
Prompt Engineering: The Skill That Separates Good from Great
My first week with Leonardo, I kept writing vague prompts and feeling frustrated. Things like “a cozy coffee shop in autumn” produced generic, forgettable results. The shift happened when I started studying how other creative professionals on the community feed write their prompts.
They weren’t just describing a scene — they were specifying camera angle, time of day, surface texture, color palette. One portrait prompt read something like: “close-up portrait, soft natural window lighting, film grain, shallow depth of field, warm golden tones, photorealistic, aged 40s woman, confident expression.”
That level of detail gives you style consistency across a project. For visual storytelling, character design, and brand work, this is everything. You stop hoping and start directing.
Pro tip: Use negative prompts to tell the AI what to leave out. Add “deformed hands, blurry face, extra limbs, bad anatomy, low resolution” to the negative prompt field. It’s one of the most powerful parts of the Leonardo AI workflow and most beginners skip it entirely.
Advanced Features That Change the Game for Creators
Image-to-Image: Upload a sketch, photo, or reference and Leonardo uses it as a visual foundation. I’ve used this to take rough mockups drawn in Procreate and turn them into polished concept art. Perfect for character design and rapid ideation.
ControlNet: Provide a pose reference image and the AI generates a character in that exact pose. A game-changer for digital artists working on sequential scenes or game assets that need positional consistency.
AI Canvas: Think of it as Photoshop meets AI-powered image generation. Paint over sections of an image and ask the AI to regenerate just that region. This is where image enhancement and fine-tuned control really shine — and it dramatically improves creative productivity.
Personal Model Training: This is one of Leonardo AI’s most powerful features for creators. Upload a set of reference images, train a custom model, and every generation after that inherits your visual style. Brand designers and marketing teams use this to maintain visual identity across entire campaigns.
3D Texture Generation: If you’re working in game development or 3D design, this feature alone is worth the subscription. Generate seamless, production-ready textures from a text description — something that used to take hours in Substance Designer can now happen in minutes.
Video Generation: Leonardo now animates stills into short clips. YouTubers, streamers, and UGC creators are using this for intro sequences, thumbnails-turned-reels, and motion content for social platforms.
API Access: For developers and marketing teams building AI content creation platforms or automated pipelines, Leonardo AI API access lets you integrate generation directly into your own tools and workflows.
Learn More: Why Millions of Creators Use Canva Every Day
Who Is This Actually For?
Indie game developers:
Concept art, game assets, character design, and 3D textures — without a full art team.
Digital artists & illustrators:
Rapid ideation, style exploration, and reference generation to speed up the creative process.
Marketing teams:
AI marketing visuals, product mockups, and campaign imagery at scale — fast and on-brand.
YouTubers & streamers:
Thumbnails, overlays, channel art, and animated visuals without a dedicated designer.
Authors & storytellers:
Book covers, scene illustrations, and visual storytelling assets for self-publishing.
Product & fashion designers:
Visualize product mockups, apparel concepts, and colorway variations before production.